Love your garden by clearing up and using garden compost
Clear up and use your garden compost to sort out your plants and improve the soil ready for next year. It will make your garden look and feel loved for the winter too. We have given you tips for autumn tidy ups in our previous blogs, and now we are gearing up for winter.
Q: So why clear up now?
A: Well, it is warming work for the gardener, the right time for you to move plants or care for old favourites, and it empties one compost store and creates a new supply of trimmings for another.
But beware: this is a muddy job on a rainy day.
Clear up - tidy garden beds and borders
- Cut back the yellowing and dying leaves of herbaceous flowering plants and tidy the plant into a good shape with stems cut back to about 15-22 cms (6-9 inches). Leave the stems of taller plants at about 30cm as the old stems will help hold new spring growth in place. Leaving stems above the plant offers some protection against winter winds, frost and snow.
- Tidy rockery and alpine plants to remove dead or over long growth.
- Tidy evergreen plants to remove any long and wispy stems which the wind may catch and rock the roots of the plants. If in doubt, read our blog on preparing for wind, and stake wobbly plants in windy spots to keep them and their roots sturdy through the winter.
- Remove annual veg. plants that have stopped producing veg. for you, weed and dig over where they grew.
- Weed and tidy around the base of shrubs and trees to keep their bark and any new stems clear of weeds and damp.
What to do with all your trimmings? Head for your garden compost container. Haven’t got one? Read our earlier blog here, make a leaf store to make leaf compost and read more at this specialist site.
And if you have room - please leave an untidy patch, out of the way of footballs and barbecues, where wildlife may shelter.
Use garden compost
How do I know when my garden compost is ready?
When it is what gardeners describe as ‘well rotted’: dark brown, smelling nice and earthy, slightly moist, with a fairly loose and easily crumbled texture.
It won't look like compost you buy in sacks. Mine always has twigs and eggshells sticking out of it. And it is still perfectly good to use: pull out the larger twigs and any material that hasn't rotted and put that ready for a new compost heap.

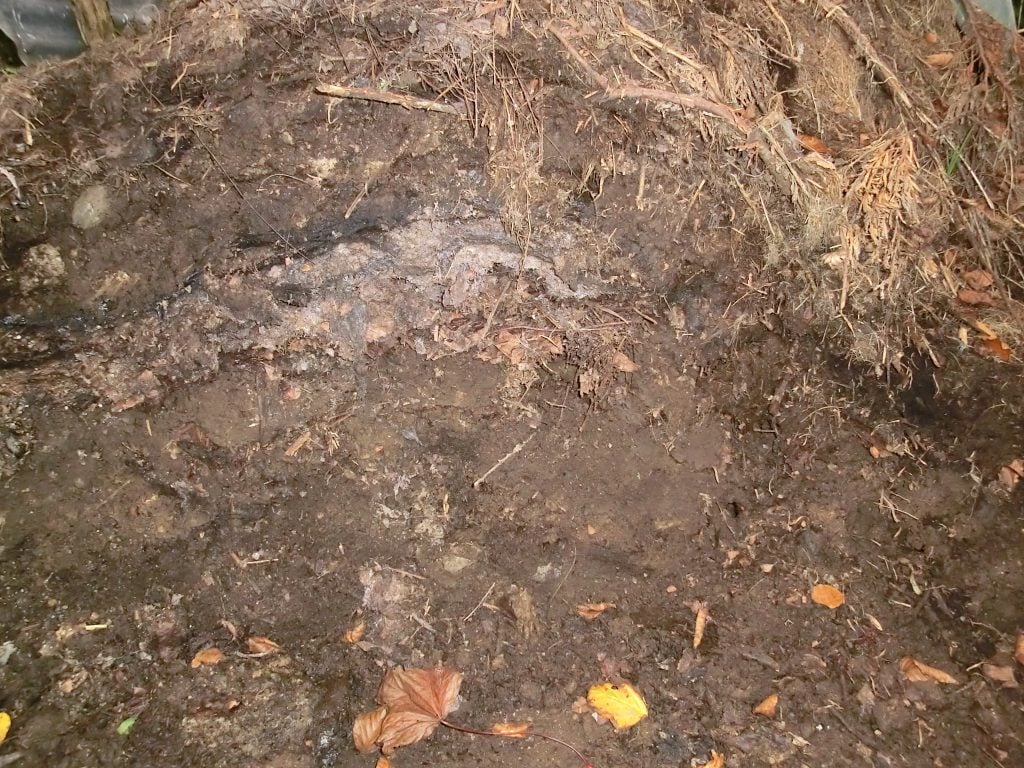
A cross section of a compost store - the top is dry and not rotted so will join the new compost store, the rest is ready to use, apart from the new leaves arriving on the wind! Sarah Buchanan. November 2016
How do I use garden compost?
Gloves on, use a garden fork to remove any loose plant material (usually on the top: just like my heap in the picture above!) that has not rotted. Put that on your new compost heap or to one side ready for it. Fill a bucket or wheelbarrow with compost and head for your borders.
Around established plants, trees and shrubs, spread a loose layer (10cm or so deep) of compost roughly over the area of the roots. Be sure the compost doesn’t swamp the stems of woody shrubs and trees or it may cause rot.
On bare ground (yes, you removed the weeds before you started on the compost), like the veg patch and where you grew annual flowers, loosen the soil with your fork and spread a layer (10cm or so deep) of garden compost over the surface. If your soil is poor, leave the compost there for worms to work on it and pull it into the soil. On better soils, you can dig about one spade or fork down and turn the soil over the compost. This is great work to warm you up!
Planting new delights? Mix some of your compost into the soil you dig out and put back in around the new plant, but don’t over-do this in the autumn as compost will hold moisture and if we have a wet winter it may rot young roots.
If you don’t need all the compost your store has created now, put it in old shop bought compost bags and store ready for the spring, when you can spread it around in the way I describe above.
Sign up for our emails below, so we can send you blogs on gardening tips, as well as updates on our sales, so you don’t miss out on those garden furniture bargains!


