How To Repair Rattan Furniture- The Ultimate Guide
Rattan furniture is an excellent choice if you're looking for something that's durable, stylish, and sustainable. Rattan material is strong, flexible, and lightweight, making it perfect for creating intricate designs and shapes that other materials can't achieve. However, like any other furniture, after years of use, it's bound to wear out. But don't worry, most of the damage that usually occurs can be easily repaired using regular household items and materials. In this post, we'll walk you through some of the common rattan furniture problems you may encounter and show you how to repair your rattan furniture, so you can keep it looking and feeling as good as new.
What You’ll Need
Before we dive into how to repair rattan furniture, it's essential to make sure you have all the necessary items on hand. Don't worry; you won't need anything fancy or expensive! You'll just need a few household items. These include:
• Sandpaper
• A soft cloth
• Replacement fibres/ a rattan patch
• An adhesive
• A hairdryer
• A pair of scissors
• A pair of needle-nose pliers
• Toothpicks
• Paint to match
• A paintbrush
Repairing Rattan Furniture: Step by Step
As you’re figuring out how to repair rattan furniture, there are a couple of steps you need to follow to ensure that your repairs are effective and long-lasting. Don't worry, though - the process is relatively simple and easy to follow. Let’s get started.
Clean the furniture
The first step in repairing your rattan furniture is to give it a thorough cleaning. Dirt and dust can accumulate on the surface of the rattan, making it harder for the adhesive to stick. So, start by brushing off any loose dirt or debris using a soft-bristled brush. After that, you can wipe the furniture down with soap and water. Mix a small amount of mild soap in a bucket of warm water, and using a soft cloth, wipe down the furniture, being careful not to soak it too much. Once you've wiped it clean, let it air dry completely before moving on to the next step. This simple cleaning process will ensure that your furniture is prepped and ready for the repair work.

Identify damaged areas
The next step is to identify the damaged areas that need attention. Look out for any loose or broken strands of rattan, as well as any cracks or holes in the weave. These are the most common areas that tend to get damaged over time, especially with regular use of the furniture. You can also check for any signs of discoloration or wear and tear on the surface of the rattan. Once you've identified the damaged areas, you'll be better able to tackle the repairs needed and get your furniture back in top shape.
Cut off broken rattan strands
Cutting off broken strands is crucial. Not only does it improve the overall appearance of the piece, but it also prevents any further damage from occurring. The last thing you want is for a broken strand to cause a larger issue down the line. One thing to keep in mind is to take pictures of the pattern before you start the repair process. This will help ensure that you can replicate the pattern as closely as possible. Plus, it's always helpful to have a visual reference to refer to.
Soak the new rattan strips/pieces in water
Before you can begin repairing the broken strands of rattan, it's essential to soak the new rattan strips or pieces in water. This step is crucial because soaking the rattan helps to make it more pliable and easier to work with during the repair process. It also helps to ensure that the new rattan blends in seamlessly with the original weave. Soak the new rattan for about 30 minutes to an hour, or until it becomes flexible enough to work with. You'll know that it's ready to be removed from the water when it becomes more supple and bendy.

Glue loose strands
Once you've identified the damaged strands and soaked the new rattan pieces, it's time to glue the loose strands back into place. To do this, apply a small amount of adhesive to the broken ends of the rattan and carefully press them back into place. Be sure to hold the strands firmly in place for a few minutes to allow the adhesive to set properly. This step requires a bit of patience, so take your time and don't rush the process. Allow the glue to dry fully before moving on to the next step.
Weave the soaked pieces into the existing ones
Moving along how to repair rattan furniture, the next step is to weave the soaked pieces in with the existing ones. To do this, use a pair of pliers to manipulate the new rattan pieces into place, gently weaving them through the existing weave. Use toothpicks or other small tools to help guide the new strands through tight spaces if needed. Take your time and be patient, as this step requires precision and attention to detail to ensure that the new weave looks as close to the original as possible.
Trim away excess material
Once you've woven in the new rattan pieces, you need to trim away any excess material. Use a pair of scissors or a sharp knife to trim the new strands to match the length of the existing weave. Be sure to cut the excess material at an angle to create a neat and tidy finish. Take your time and use a steady hand to ensure that you don't accidentally cut away any of the existing strands.

Tuck the ends of the replacement strands beneath the others
After trimming away the excess material, it's essential to tuck the ends of the replacement strands beneath the others. This step is important because it helps to secure the new strands in place and prevent them from coming loose over time. To do this, use a toothpick or other small tool to carefully tuck the ends of the new strands beneath the existing weave. Be sure to tuck the strands in securely, but without disturbing the surrounding weave.
Wait for the glue to dry completely
After completing the repair process, it's important to allow the glue to dry completely before using the furniture. This step is crucial because it ensures that the new weave is secure and won't come apart when you sit or lean on the furniture. Be sure to check the manufacturer's instructions for the recommended drying time, but in general, you should wait at least 24 hours before using the furniture again. It can be tempting to test out your repair right away, but waiting for the glue to dry completely will ensure that your repair lasts for years to come. So, take a break, grab a cup of tea, and let the glue do its thing - you'll be back to enjoying your beautiful rattan furniture in no time!
Repairing scratches & marks

While rattan furniture is beautiful and durable, wear and tear over time is inevitable, especially if you have children or pets around or if the furniture gets a lot of use. Luckily, many scratches and marks can be repaired easily. In this how to repair rattan furniture guide, we’ll walk you through a few simple steps. These include;
Clean your furniture
Cleaning your rattan furniture is an essential initial step you shouldn't skip when trying to repair marks on it. Dust, grime, and even pet hair can accumulate in the crevices and scratches of your furniture, making the restoration process even harder. By cleaning your furniture before repairing it, you won't push the dirt further into the material, and any fixes you make will be more effective. Additionally, cleaning the area around the scratch with a soft cloth and soap and water can also help to remove any stains or discoloration, making the area look as good as new. So, before you start repairing those scratches and marks, grab a cloth and give your rattan furniture a good cleaning.
Use a hairdryer
One handy tool that can make the repair process easier is a hairdryer. By using a hairdryer to warm up the rattan, you can soften the weaves and make it easier to manipulate the fibres back into place. This is particularly useful if you need to weave new strands in to replace damaged ones. Without heating up the rattan, it can be tough to get those weaves to bend and conform like they're supposed to.
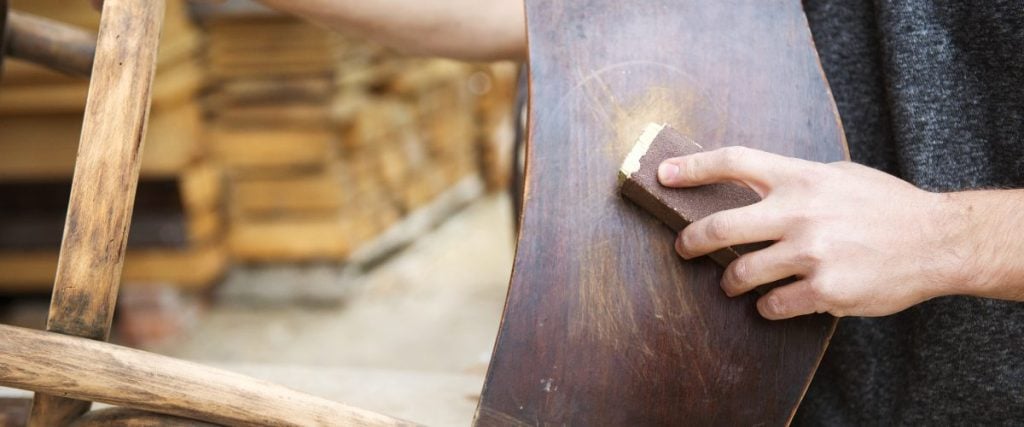
Use sandpaper
The next step is to give your furniture a nice finish. One way to do this is to use sandpaper to polish the surface of the rattan. This will help to smooth out any rough areas and give the furniture a nice, even finish. After sanding, you may also want to consider applying a coat of varnish to provide extra protection and shine. Varnish can help to protect the rattan from future scratches and marks, as well as UV rays and other types of damage. It can also give your furniture a beautiful, glossy finish that will make it stand out.
Repairing wobbly chair legs

You know the feeling, you sit down at your lounger or outdoor table, and it wobbles. It's frustrating, uncomfortable and potentially dangerous. But what causes this wobbliness, and how can you fix it? This is another frequently asked question on how to repair rattan furniture. The main culprit for this is uneven or unstable ground. If your rattan/outdoor furniture is on an uneven surface, the legs will be unable to distribute the weight evenly, leading to the dreaded wobbles. The solution is simple, invest in some furniture pads or adjustable leg levellers to balance out the legs. Not only will this help prevent wobbling, but it will also protect your precious flooring from scratches and dents, so it's a win-win situation. Once you’ve dealt with the ground, then you can go into dealing with other factors affecting your furniture legs.
Repairing cracks in legs
Cracks in the legs weaken the structure of the furniture, leading to instability and wobbling. Therefore, repairing cracks in your furniture legs can be the key to stabilizing your wonky items. To do this, you'll need to apply a wood filler to the affected area. Start by cleaning the cracked area with a soft cloth to remove any dirt or debris. Then, use a toothpick to apply the wood filler to the crack. Make sure to fill the crack completely and smooth out any excess filler. Allow the filler to dry completely before sanding the area smooth with sandpaper. Once the area is smooth, you can paint or varnish the leg to match the rest of the furniture. This will strengthen the leg and prevent further cracking, ultimately reducing the wobbliness of your furniture.
Repairing broken strands in the legs
Broken strands can weaken the structure and cause the legs to become unsteady. To fix this, identify the broken strands and use a pair of scissors to cut them away. Soak a new piece of rattan in water for at least 30 minutes, then weave it into the existing strands using pliers and toothpicks to help with the weaving process. Tuck the ends of the replacement strands beneath the others and glue them in place. Then wait for the glue to dry before using the furniture again.
Repairing sagging seats

Have you ever sat in a rattan chair and noticed that the seat is starting to sag? It can be quite uncomfortable and unsightly, but what causes this common problem? One reason could be that the rattan is stretching over time. As you sit in the chair repeatedly, the fibres in the rattan are pulled and eventually start to lose their elasticity. Another factor could be weight. The more people sit in the chair often, the more stress to the rattan which may cause it to sag faster. Heat and exposure to the elements can also take a toll on your rattan seats. As the material expands and contracts with temperature changes and exposure to moisture, it can start to lose its firmness. However, there’s a few simple things you can do to fix this.
Wiping the seat with warm water and letting it dry
This method of repairing rattan furniture can actually be an effective one for sagging seats. This is because moisture can help the rattan fibres expand and tighten, which may help restore the seat's shape and firmness. Simply wipe down the seats with the warm water, making sure to get all the crevices and corners. Then, let the seats dry completely. However, it's important to avoid using too much water, as this can cause the rattan to warp or become discoloured. Instead, use a damp cloth to wipe down the seat, and then allow it to air dry completely before using it again.
Using a plant mister to spray the furniture
Spraying your furniture with a plant mister may sound odd at first, but it can actually work wonders in preventing sagginess. The misting action helps to hydrate and expand the rattan fibres, which can help restore some of their natural elasticity. To do this, fill a plant mister with warm water and gently spray the affected area until it is lightly dampened. Then, use your hands to gently push and manipulate the rattan fibres back into place. This should help to reduce the sagging and restore the shape of the seat. It's important to note that you don't want to over-saturate the rattan. So, use a light touch and be patient as you work the fibres back into shape.
Add more cushions to your furniture
Cushions can help distribute weight more evenly across the rattan, reducing the pressure on any one particular area. This can prevent further sagging and increase the comfort of the furniture. When selecting cushions, it's important to choose ones that are appropriately sized for your furniture and made from materials that can withstand exposure to the elements. Additionally, cushions with removable covers can make cleaning and maintenance easier in the long run. Plus, with all the different colours and textures available, you can customize your cushions to fit your style and add a personal touch to your space.
Finally
Well, there you have it folks! That's how you can fix your rattan furniture like a pro! We've covered a lot of ground today, from cleaning your furniture to repairing wobbly legs and sagging seats. We learned that broken strands and cracks can cause wobbliness, and that sagging seats can be caused by weight and exposure to the elements. But fear not, with some sandpaper, adhesive, a hairdryer, and some patience, you can repair your rattan furniture and have it looking brand new in no time. Don't forget to take your time, be gentle with the rattan, and always wear protective gloves. Now, go forth and repair your furniture with confidence!
Sign up for our emails below, so we can send you blogs on gardening tips, as well as updates on our sales, so you don’t miss out on those garden furniture bargains!


